
How Do You Get Back in a Kayak After Capsizing?
Key takeaways
- The paddle float self-rescue turns your paddle into an outrigger so you can re-enter a capsized kayak alone.
- The heel hook and scramble (cowboy) re-entries are the two main solo techniques; both work best after practice in calm water.
- With a partner, the T-rescue is the standard assisted method; always wear a life jacket and tell someone your route.
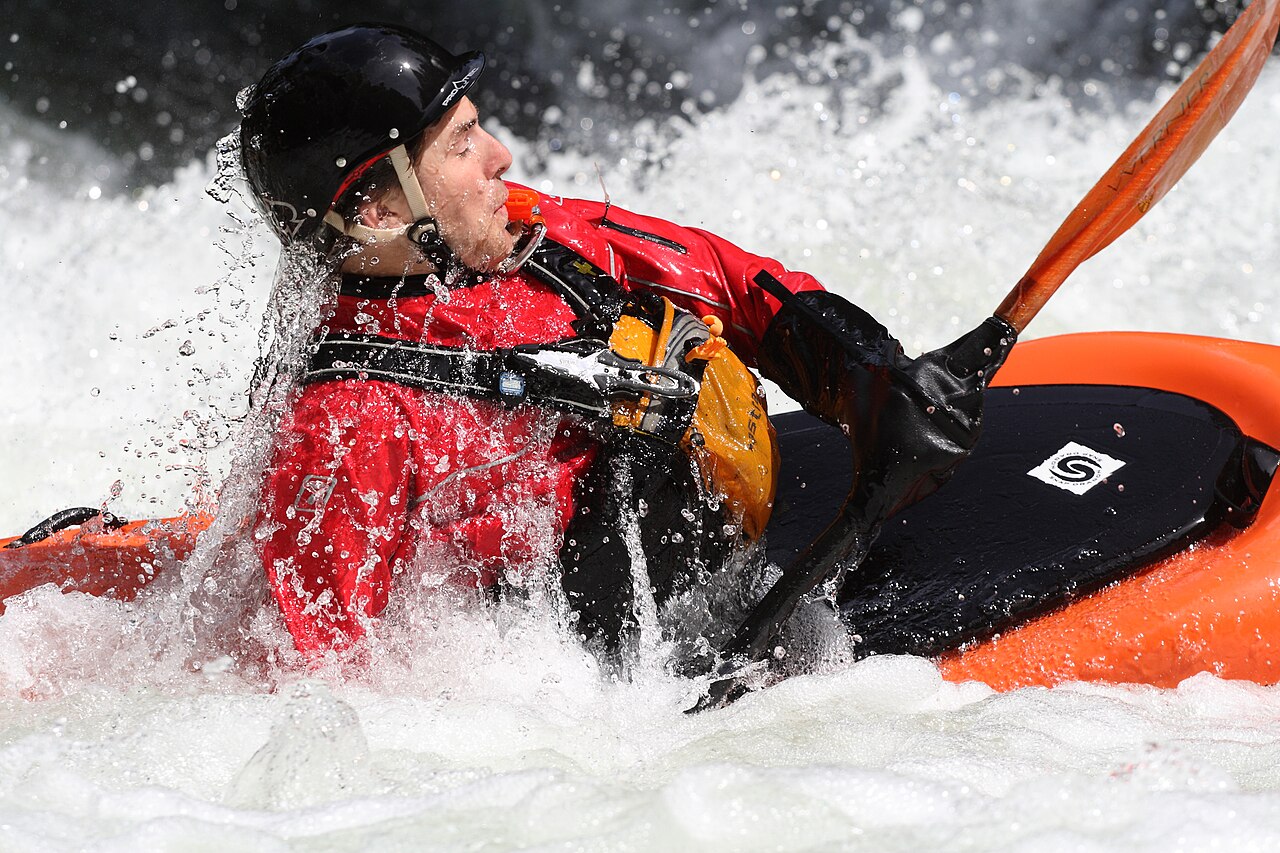
A capsize is the moment a kayak flips upside down in the water, leaving the paddler separated from the boat. In calm water on a warm day it is an inconvenience. In cold water far from shore it can become dangerous quickly.
Getting back in is a skill, not a matter of strength.
Most re-entry methods share the same logic: stay with the boat, steady it somehow, keep your body low, and slide back into the cockpit without tipping the hull again. This article explains the main techniques solo paddlers use, including the paddle float rescue, the heel hook, and the scramble re-entry, plus how assisted rescues work when a partner is nearby and what to do in the first seconds after a flip.
Why getting back in is harder than it looks
A kayak cockpit sits a few inches above the waterline. Hauling a full body over that edge from the water requires pulling upward against your own weight while the hull rocks. According to paddling instructors writing for Paddling Magazine, the trick is using technique instead of muscle: keep your weight low and spread out, and use leverage rather than raw lifting.
Cold water makes everything harder. When a kayaker capsized off Fowey, Cornwall, he survived by remembering the RNLI's Float to Live campaign instead of thrashing to climb back aboard immediately. Cold water steals strength fast, so fighting the situation burns the energy and body heat you need.
Floating first, getting breathing under control, and then attempting re-entry is the safer sequence.
Paddling alone adds risk because no partner can steady your boat. That is why solo self-rescue methods use gear, like a paddle float or a stirrup sling, as a substitute for a second pair of hands.
The paddle float self-rescue
The paddle float self-rescue is the best-known solo method for sea kayakers. A paddle float is an inflatable bag or foam sleeve that slides over one blade of your paddle. Once attached, the paddle becomes an outrigger that holds one side of the kayak steady while you climb in.
KayakEnjoy's guide describes the setup this way: inflate the float, slide one end of the paddle into the float's sleeve, and secure it tightly. Then place the paddle shaft across the back deck behind the cockpit, perpendicular to the kayak, with the float end resting in the water. The paddle should be tucked under the deck bungees behind the cockpit combing so it cannot drift away.
There are two main types of paddle float. Inflatable floats pack small and let you adjust buoyancy, but they must be blown up before use. Foam floats are bulkier yet ready instantly, which can matter in an emergency.
Many paddlers keep an inflatable float clipped to the deck bungees near the stern so it is within reach, according to the Yellow Pages kayaking safety guide.
Once the outrigger is rigged, the re-entry follows the heel hook or scramble motion described below. After you are seated, pump the water out of the cockpit with a bilge pump, reattach your spray skirt, then deflate and stow the float.
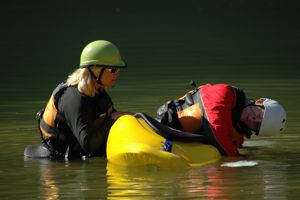
The heel hook method
The heel hook is one of the most common solo re-entry moves, and it works with or without a paddle float. The name comes from hooking your heel over the deck of the kayak.
The sequence goes like this. First, right the capsized kayak: position yourself on one side, grab the near edge of the hull with both hands, and pull it toward you in one quick motion. Then rig your outrigger by laying the paddle across the back deck with the float in the water, or simply hold the paddle shaft tight against the deck.
Next, float on your back beside the cockpit with the paddle held firmly across the deck. Kick your legs to bring your body horizontal near the surface. Hook one heel over the near deck edge while keeping your weight on the paddle float side.
Kick hard and pull yourself chest-first onto the back deck, keeping your head low. Then swing your legs into the cockpit one at a time, rotate into the seat, and settle your weight in the middle of the boat.
The heel hook works because your legs do the heavy lifting. KayakEnjoy notes that hooking the heel while holding the paddle tight against the kayak gives you a stable anchor point, which is the whole battle when you are tired.
The scramble (cowboy) re-entry
The scramble, sometimes called the cowboy scramble, needs no gear at all. You approach from the stern, pull yourself up so your chest is across the back deck, then straddle the kayak like a cowboy mounting a horse. Kicking your feet while pulling up adds propulsion.
From the straddle position, you inch forward toward the cockpit, keeping your weight centered and low, then lower yourself into the seat leg by leg. This method is fastest when it works, because there is nothing to rig. Its weakness is that a kayak full of water sits low and tips easily, so the scramble demands decent balance and calm conditions.
A practice tip from a self-rescue paddler who tested the technique in 30-knot wind gusts off Tacoma, Washington: never let go of the kayak or the paddle. Hand-over-hand movement along the deck lines keeps you connected to the boat. And move slowly.
He reported completing a full scramble rescue in 73 seconds from exit to paddling again, which shows that steady technique beats rushing.
Assisted rescues when paddling with others
When a partner is nearby, the T-rescue is the standard assisted rescue for sea kayakers. Paddling Magazine's step-by-step guide, written by ACA Level 4 instructors Sharon and Alec Bloyd-Peshkin, runs through it in six stages. First, take a moment to communicate and make sure the swimmer can cooperate.
Second, have the swimmer right their boat and slide to the bow while the rescuer paddles alongside.
Third, the swimmer holds the deck lines of both boats and the rescuer swings the capsized kayak into a T position against their own cockpit. Fourth, the rescuer slides the capsized boat's bow across their spray deck, tips it to drain the water, flips it fully, and slides it back into the water. Fifth, the boat is positioned stern-to-bow for re-entry.
Sixth, the swimmer climbs in using a scramble, crab, or heel-hook entry while the rescuer drapes their body over the deck to hold the boat steady.
The article stresses a few principles that apply to every assisted rescue: both people keep hold of the boats at all times, slide boats instead of moving the swimmer, and edge instead of lifting the capsized hull. Practice in varied conditions is what makes these steps reliable when they count.
What to do in the first seconds after a flip
The order of operations matters more than any single technique. First, keep your spray skirt on for a moment and try a roll if you know one. If the roll fails, perform a wet exit: stay calm, find the pull tab on the spray skirt, pull it forward to release the skirt, and push yourself out of the cockpit.
Second, get hold of the boat and your paddle. A loose kayak drifts fast in wind. Third, if the water is cold, follow the RNLI's Float to Live steps: tilt your head back, relax, control your breathing, move your hands and legs gently, and spread your arms and legs to stabilize.
Only once your breathing is steady should you attempt re-entry or swim to safety.
Fourth, right the kayak, rig your float if you carry one, re-enter using the method you have practiced most, and pump out the cockpit. If re-entry fails repeatedly, stay with the boat. It is far more visible to rescuers than a lone swimmer, and it keeps you afloat.
Gear that makes re-entry possible
A short list of safety gear turns a capsize from a crisis into a drill. A paddle float (inflatable or foam) is the single most useful solo tool. A bilge pump clears the cockpit after re-entry.
A sponge handles the last puddles. A paddle leash prevents the wind from taking your paddle. A well-fitted life jacket is non-negotiable, and a whistle attached to it lets you signal for help.
Stirrup slings, which are loops of webbing hung over the hull as a foothold, are another option for solo re-entry and appear in British Canoe Association rescue guidance. Whatever you carry, practice deploying it in calm, warm water before you need it in rough, cold conditions.
FAQ
Should I learn to roll instead of practicing re-entries?
Learn both. A roll keeps you in the boat and is the fastest recovery, but rolls fail in surf, fatigue, or loaded touring kayaks. Re-entry skills are the backup plan every paddler needs.
How long does a self-rescue take?
A practiced scramble re-entry can take about a minute. A paddle float rescue with pumping out the cockpit takes several minutes. Cold water, waves, and a loaded boat all add time.
Is it safe to practice capsizing alone?
Practice re-entries with a buddy watching, or at minimum in shallow, warm, calm water near shore with your phone in a dry bag on shore. Tell someone your plan either way.
Does a paddle float work in rough water?
It helps, but rough water makes every method harder. Inflatable floats must be fully inflated to give real buoyancy, and foam floats are more forgiving when waves make inflation tricky.
The bottom line
Getting back into a kayak after capsizing is a practiced skill, not a strength test. The paddle float rescue gives solo paddlers an outrigger to lean on. The heel hook and the cowboy scramble cover re-entry with and without gear.
The T-rescue handles it when a partner is present. Pick one method, drill it in calm water until it feels boring, and make it part of every paddle season.
Topics: kayaking, self-rescue, paddle float, capsize recovery, water safety
Latest in Sports
- How to choose a kayak paddle length
- What is the difference between snorkeling and freediving gear?
- Why do trail running shoes have lugs and road shoes do not?
- Why do down sleeping bags lose warmth when wet?
Subscribe for weekly outdoor skills explainers in your inbox.
Related stories

Why Is Altitude Sickness Worse for Some People?
Altitude sickness hits some people harder because of genetics, ascent speed, and prior history, not fitness level. Here is what raises risk
Why Do You Get Blisters When Hiking and How to Prevent Them
Friction plus moisture plus heat equals a blister. Learn why hiking breeds all three, and the boots, socks, and tape system that keeps
How to choose hiking boots for beginners: fit, features, and break-in
Beginners should buy for fit first: snug everywhere, tight nowhere, with a thumb's width at the toes. Here is how to size, test,